

A database is a storage device for information. Databases come in many forms and sizes. They can be anything from a simple text file, to an excel file, to an advanced SQL or MYSQL database. The Noventri Digital Signage Suite is capable of connecting to any ODBC compliant database.
The database connectivity features in the Noventri Digital Signage Suite are very powerful, and extremely useful in creating and maintaining your digital signage content. In many cases the data that users wish to display on their signage already exists in a database. So why re-type all of this data when you can simply create a live link to the data? With this setup, when the data in the database changes, so does your digital signage!
A video tutorial covering the basics of database in Noventri Suite can be found here.
Here's How:
CONNECTING TO YOUR DATABASE
Step 1: In the Noventri Digital Signage Suite, on the "Design" tab, select or create the region in which you desire to populate with information from your database.
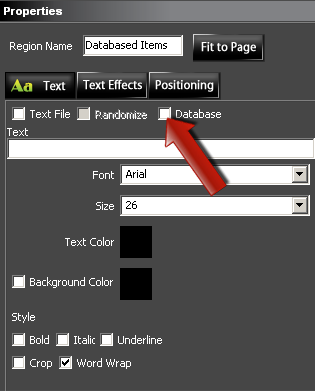
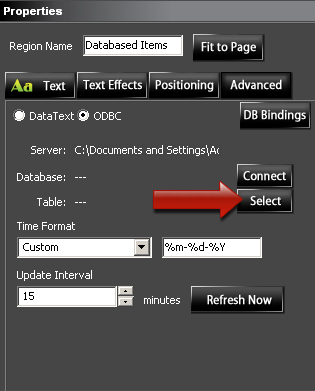
Step 2: In the bottom left corner of the screen you will see the "Properties" window. Check the "Database" checkbox.
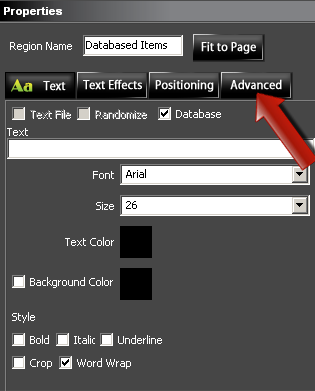
Step 3: You will see a new tab appear in this window labeled "Advanced". Click on this tab.
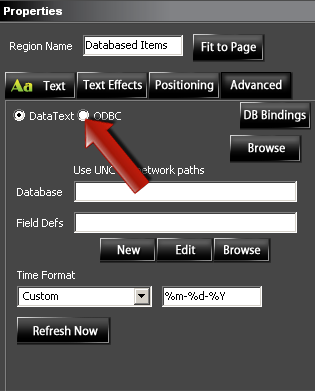
Step 4: Click the radio button beside "ODBC".
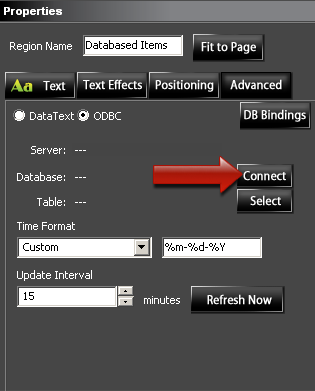
Step 5: Click on the "Connect" Button.
Step 6: A new window will open. Choose the appropriate driver from the drop down, and fill in the applicable information in the text fields.
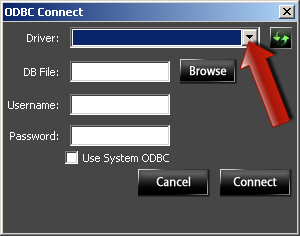
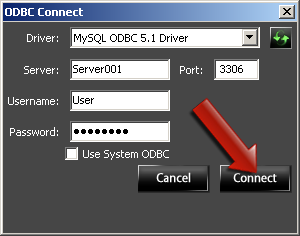
Step 7: Click "Connect". Figure 1 is an example when connecting to excel. Figure 2 is an example when connecting to SQL or MYSQL.
TIP: When connecting to Excel, the excel file must be closed so that Excel does not hold a lock on the file.
Figure 1:
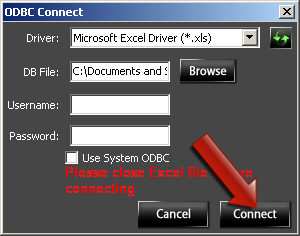
Figure 2:
Step 8: Click the "Select" button.
Step 9: When using a file-based database such as excel (Figure 1):
1. Make sure the "Basic" radio button is selected.
2. Next, from the "Table Name" column, choose the desired sheet name (which is represented as tabs on the excel file when opened in excel).
3. Then, click the refresh button (seen in arrow #3) that resides in the center right side of the dialog at the end of the "Select Statement" field. After a few seconds you should see this chosen table's data populate in the dialog.
4. Finally, press the "OK" button.
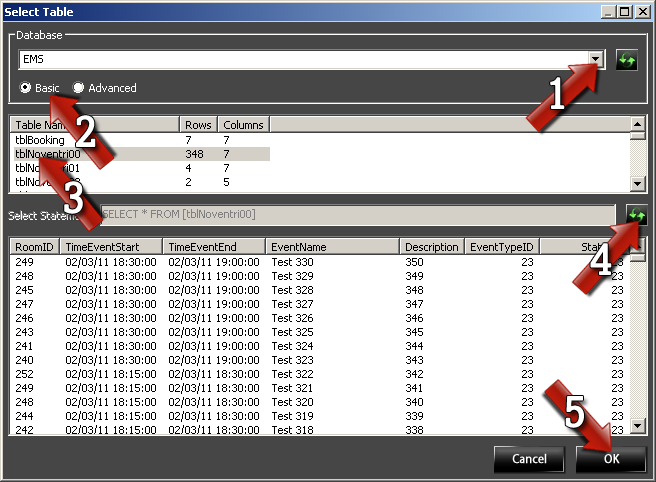
When using a database server such as SQL or MYSQL (Figure 2):
1. Choose the desired database from the "Database" drop down.
2. Then, make sure the "Basic" radio button is selected.
3. Next, from the "Table Name" column, choose the desired table where the data you wish to display resides.
4. Then, click the refresh button (seen in arrow #4) that resides in the center right side of the dialog at the end of the "Select Statement" field. After a few seconds you should see this chosen table's data populate in the dialog.
5. Finally, press the "OK" button.
NOTE: If no data appears, the chosen table is either empty, or the connection credentials entered do not allow you access to the data.
Figure 1:
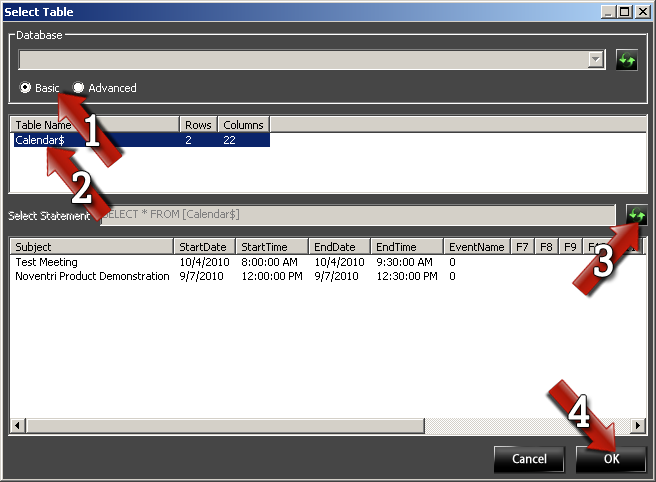
Figure 2:
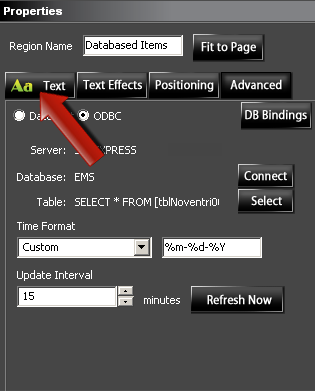
Step 10: We have established the connection to the database, and chosen what data to pull. Now we are ready to display it in our region. Back in the "Properties" window, switch over to the "Text" tab.
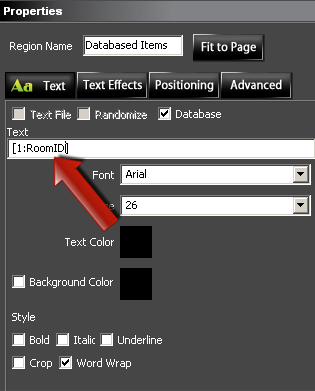
MAKING THE DATA APPEAR IN YOUR REGION
Step 11: In order to make the data appear in the region, we must enter the formatter referring to the particular record we want to pull in. In the example below, we used [1:RoomID]. The brackets and colon will always stay the same; the values in blue will be what you change. The first value (1 in our example) refers to the row of data. The second value (RoomID in our example) refers to the column of data. This can be swapped out for a numerical value if your table does not have column names ( [1:2] for example, which would be row 1, column 2).
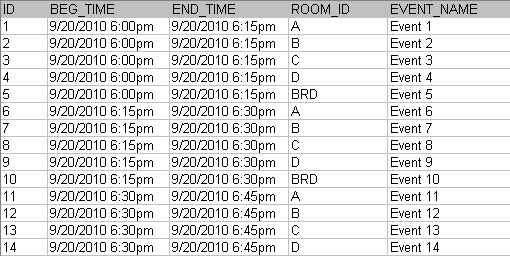
To further illustrate this, take the table below as our data set. To display the record "Event 1" in our region, we would use the formatter [1:EVENT_NAME] OR [1:5]. This is because the record "Event 1" is in the first row and fifth column (column headers are not counted as rows). Of course, we don't have to worry about it being 5 columns over if we use [1:EVENT_NAME] because we are replacing "5" with the column name, "EVENT_NAME".
To display the record "Event 10" in our region, we would use the formatter [10:EVENT_NAME] OR [10:5]. This is because the record "Event 10" is 10 rows down and 5 columns over.
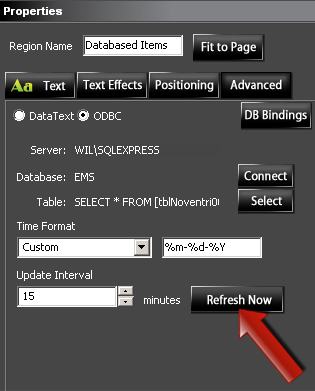
Step 12: Now press the "Refresh Now" button, and in a few seconds your region should populate with the referenced data.
Step 13: You can also add multiple formatters into the same region. As shown below, we have 4 different formatters:
[1:ROOM_ID]\n[2:ROOM_ID]\n[3:ROOM_ID]\n[4:ROOM_ID]
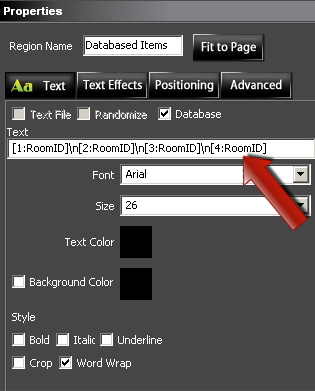
In this case the formatters are seperated by "\n" which is the return character. This is inserted when you press the return / enter key on your keyboard. Therefore, based on the example data we used in Step 11, the data output will be:
A
B
C
D
The return characters are not necessary, and can be removed or replaced with whatever you wish. Take the following two examples for reference:
Example 1:
[1:ROOM_ID][2:ROOM_ID][3:ROOM_ID][4:ROOM_ID]
Will output:
ABCD
Example 2:
[1:EVENT_NAME] will take place in room [1:ROOM_ID] beginning [1:BEG_TIME].
Will output:
Event 1 will take place in room A beginning 9/20/2010 6:00pm.
TIP: You can Copy and Paste database regions and simply change the formatter to save re-connecting to the database each time.
FORMATTING TIME AND DATE DATA
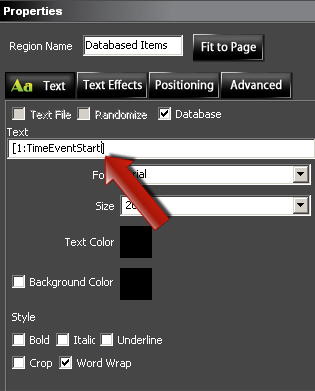
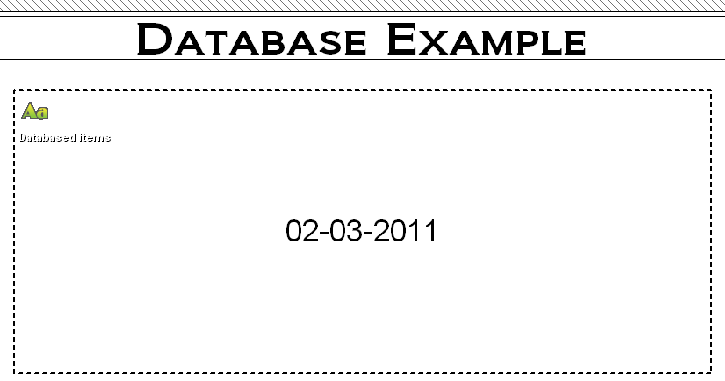
Step 14: When bringing in time and date, if the database stores these values in a time/date data type, we can modify the way the data outputs. Pulling from the SQL database used in Step 9 Figure 2, we will use the formatter [1:TimeEventStart] to pull the beginning date/time field.
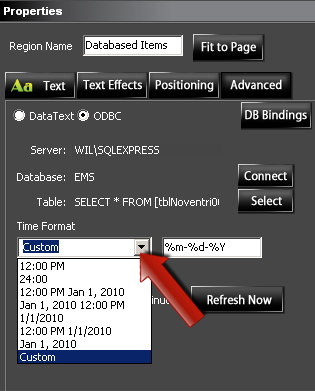
The data comes in as 02-03-2011 because the default time format is so. To change this we go back to the "Advanced" tab in the "Properties" window. You will see the default for "Time Format" is set to "Custom" in the drop down menu. If you know how to use time formatters you can enter the desired format in the text field to the right of the drop down. If you do not, then you may simply choose the desired format from the drop down.
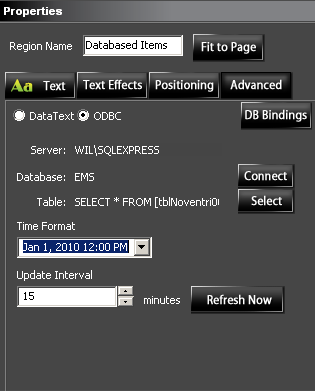
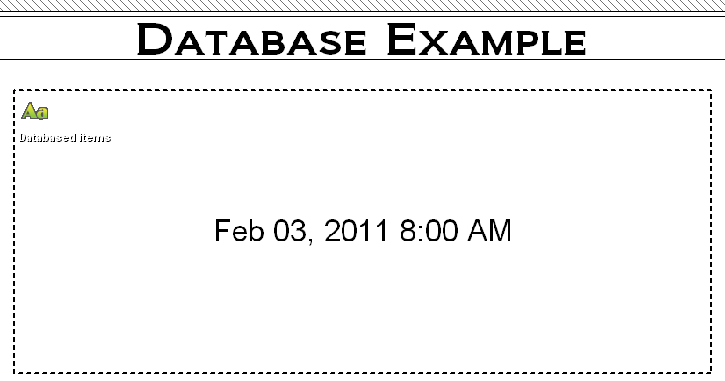
Step 15: Once you choose or enter the desired format, the data will change in your workspace.
MATCHING DATABASE REGIONS
The Noventri Server and SF-100e players run most efficiently when all database regions are matched. The reason for this is that any mis-matched region causes a separate individual query to the database(s) and separate content updates to the SF-100e. If all regions are matched in their update interval, even if they go to different databases, they will still only generate one content update to the SF-100e. It is only when there are different update Intervals in play that separate content updates to the SF-100e are generated. To fix this issue and make the system operate at peak efficiency, we can use the "Match Database Region" functionality. This is not always possible if you have your regions changing at different intervals for a reason. If this is the case then that is fine; however, if possible we recommend matching database regions. Here's How:
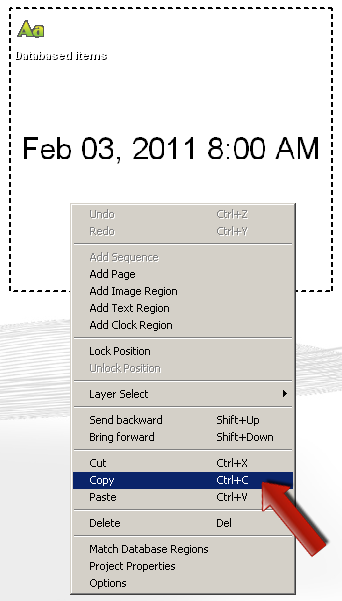
Step 16: Let's first make a copy of our current region. This will keep us from having to make a new region and re-connect to the database. Right-click the database region, and click "copy."
Step 17: Now paste the region. Again, this will make it easy for us because the region is already connected to the database, and all we have to change is the formatter.
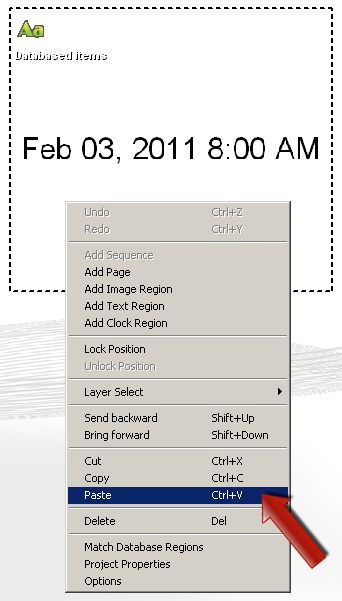
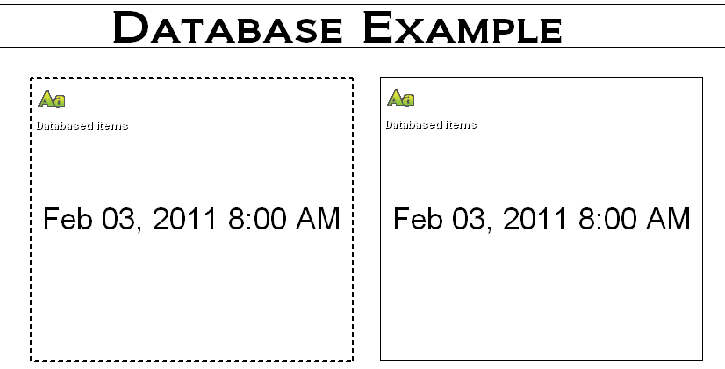
Step 18: Once pasted, you can move the region to the desired location in your workspace.
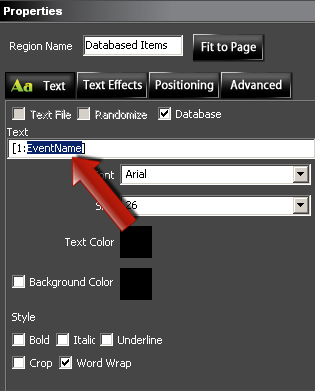
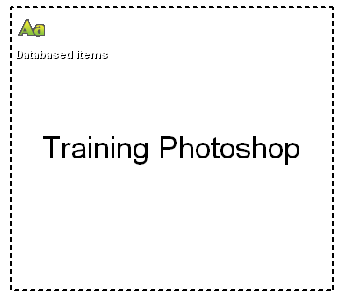
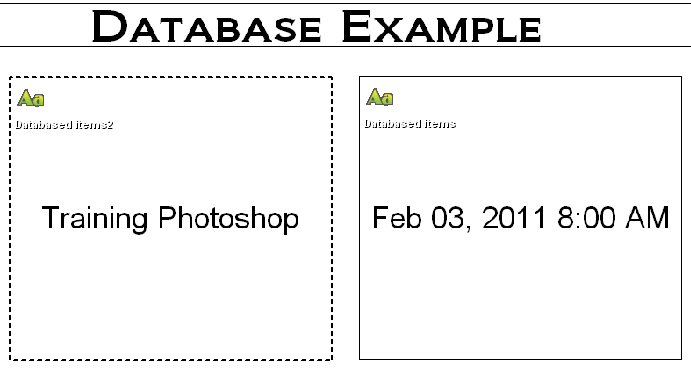
Step 19: Now change the formatter to something different. In our example we have changed it to [1:EventName]. Once changed, you will see that the region has switched over to the data that your formatter is pointing to. In our example, the data has changed to "Training Photoshop".
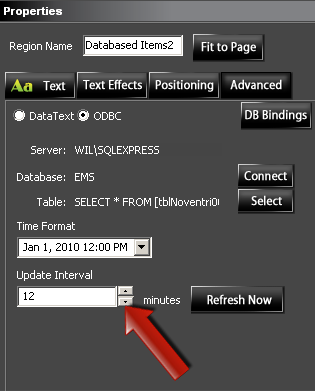
Step 20: Now we are going to intentionally mis-match the two regions. To do this change the "Update Interval" to something other than the default 10. The Update Interval is the interval (in minutes) in which the Noventri Server checks the database for updates.
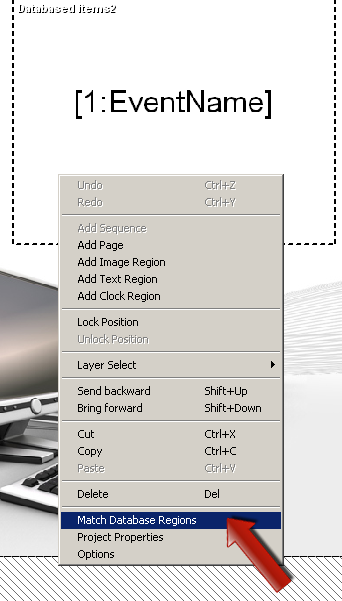
Once changed, you will see that our data disappears and we are left with the formatter displaying. Now the software acknowledges this region as a different database connection. To re-match this region to our original one; right click in the workspace and choose "Match Database Regions".
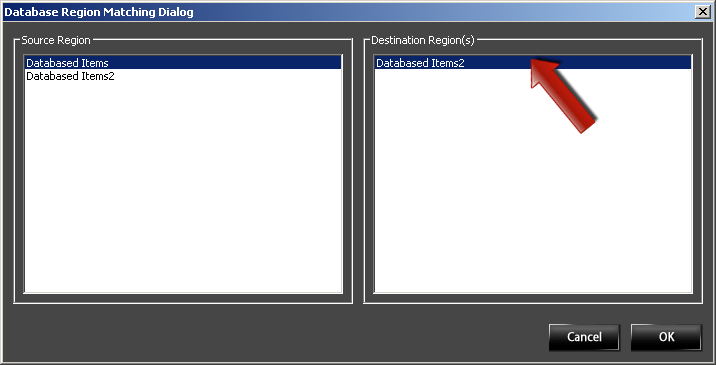
Step 21: A new dialog will open. On the left side of the dialog we have a list of all Database regions in the project. These are labeled "Source Regions". On the right side of the dialog is a list of "Destination Regions". Click on the Source Region (the region with the database settings you want to keep) and any un-matching regions will appear on the right in Destination Regions.
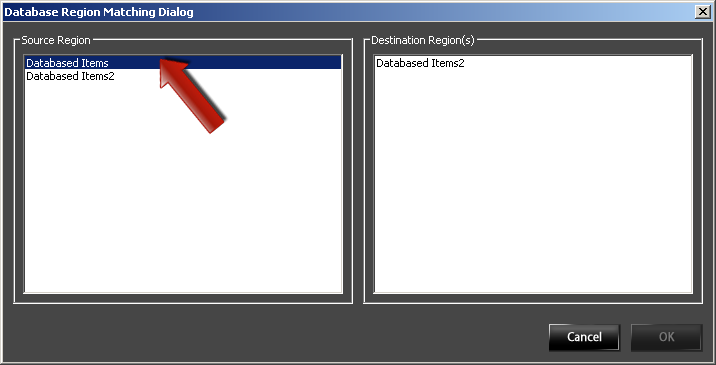
Step 22: You can then click on the destination region you wish to match to your source region and press "OK". If there are multiple Destination Regions you wish to match to a single source region, you can hold Ctrl on your keyboard and click the desired destination regions. You can also Shift-click and all regions between your first and second click will be chosen.
Step 23: You will now see that the formatter in your workspace is replaced with the correct data. This is because the regions are now matched, and again both regions are listed as a single database connection. Now you're ready to publish your project!
I hope this post was helpful!
Please feel free to post any questions in the Technical Support Center thread or view a video tutorial covering the basics of database driven content in Noventri Suite here.